
आज, मैं आपको बताऊंगा की 2-step verification कैसे चालू किया जाता है।
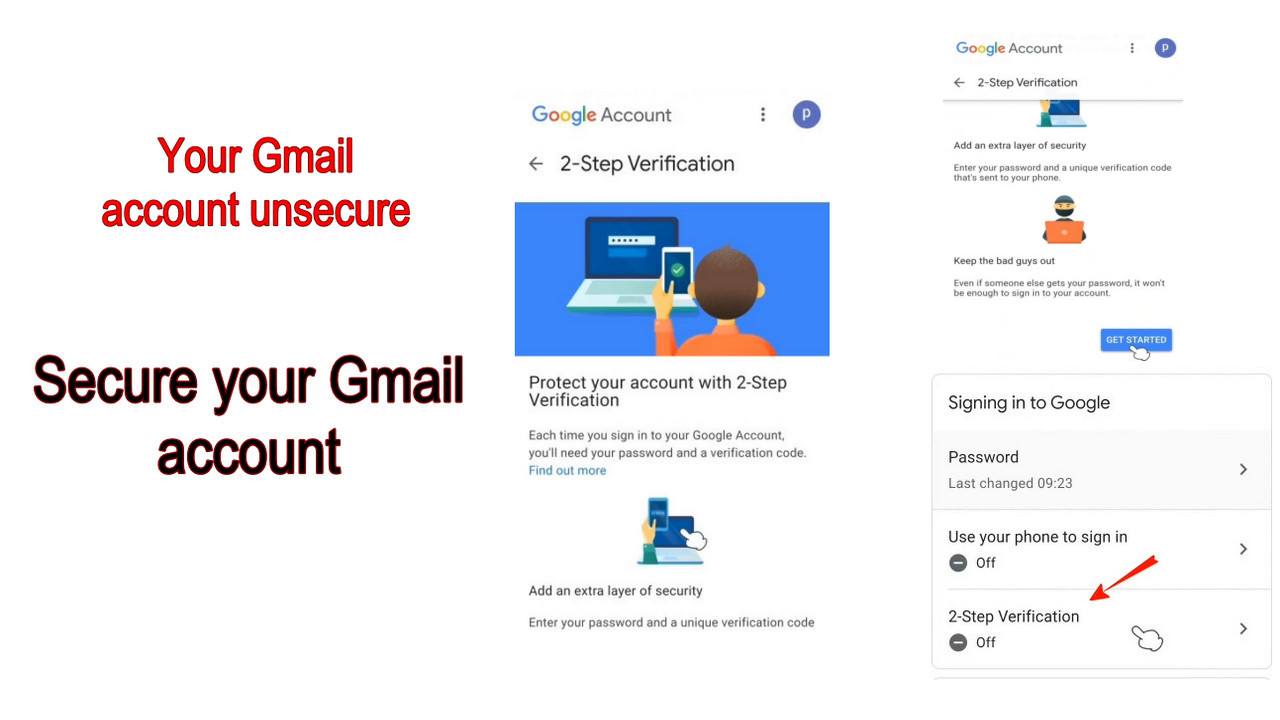
क्या आप जानते हैं कि Gmail Account अतिरिक्त सुरक्षा प्रदान करता है? यदि आप अपने Gmail Account को और अधिक सुरक्षित करना चाहते हैं, तो 2-step verification चालू कर सकते है। आमतौर पर ज्यादातर लोग ऐसा करते हैं, लेकिन कुछ लोगों को यह नहीं पता होता है कि 2-step verification क्या है और इसे कैसे चालू करें।
Table of Contents
2-step verification का महत्व
तो दोस्तों, एक बार जब आप 2-step verification चालू कर देते हैं, तो 2-step verification के बिना किसी अन्य डिवाइस में Log in न कर पाएंगे। अगर किसी को आपका पासवर्ड पता लग जाये, तो भी आपका Gmail Account बिना किसी अनुमति के, प्राइमरी डिवाइस के बिना और 8-अंकीय बैकअप code के बिना कोई भी आपका Account एक्सेस नहीं कर सकता है। एक बार जब आप 2-step verification चालू कर देते हैं, तो आप प्राथमिक डिवाइस में केवल Log in कर सकेंगे। एक बार जब आप उस समय किसी अन्य डिवाइस में Log in करने का प्रयास करते हैं, तो Google आपसे 8-digit backup code या मोबाइल नंबर और पासवर्ड मांगता है। यदि आप 8-digit backup code या security code देने में सक्षम हैं, तो आप प्राथमिक उपकरण के बिना अपने खाते तक नहीं पहुंच सकते। साथ ही, Google को 6 digit verification code आसानी से प्राप्त करने के लिए मोबाइल नंबर जोड़ने की सुविधा दी जाती है।
यह technical युग है। इसलिए हम Gmail पासवर्ड secure नहीं रख सकते। कभी-कभी Gmail पासवर्ड चोरी हो जाता है, कोई आपके Gmail Account को एक्सेस कर लेता है। जो की आपका Gmail Account अधिक महत्वपूर्ण है, और आप इस Gmail के साथ अधिक स्थान पर Log in किया हुआ हैं तो आपका Gmail Account बहु उपयोगी होगा। उस प्रकार के Google खाते को अधिक सुरक्षित की आवश्यकता होती है कि कोई भी आपका Google पासवर्ड चुरा लेने पर भी पहुंच न सके।
दोस्तों यहाँ 2-step और कुछ नहीं बल्कि अपने Google खाते में साइन इन करने के लिए 2-step है।
वास्तव में 2-step verification क्या है?
First step और second step for access your Google account.
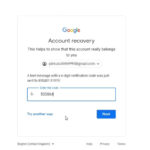
जब आप अपने Google खाते में Log in करते है तब Gmail का पासवर्ड पूछा जाता है, पासवर्ड first step है, अगर आप अपना Google पासवर्ड भूल गए हैं तो आप “Forgot password” लिंक पर क्लिक करें। first step दूसरी method से शुरू होगा। यानी आप पासवर्ड भूल गए हैं, फिर अगला first step शुरू होगा। Google security code, verification code, phone number जैसे कई विकल्प पूछ सकते है। यदि आप पासवर्ड भूल गए हैं, तो आपको अपना Google Account 8-digit backup code और एक अन्य विकल्प मिलता है। यदि आप 8-digit backup code रखने का प्रयास करते हैं, तो 8-digit backup code first step होगा और आपका phone number second step होगा। यदि आपके पास अपना Gmail 8-digit backup codeनहीं है, तो आप एक पुनर्प्राप्ति खाते के माध्यम से अपना Account प्राप्त कर सकते हैं या Gmail Account को पुनर्प्राप्त करने के लिए Google को रिक्वेस्ट कर सकते है।
अब, आप 2-step verification को ठीक से समझ गए होंगे। अब हम step by step समझते हैं।
2-step verification कैसे चालू करें?
आप अपने मोबाइल पर 2-step verification चालू करना चाहते हैं, फिर आपको अपने Google खाते में Log in करना होगा, फिर आप 2-step verification चालू कर पाएंगे।
आइए समझते हैं स्टेप बाई स्टेप प्रोसेस।
Step 1: Log in
अपने Google खाते में Log in करें।
जैसा कि नीचे स्क्रीनशॉट में दिखाया गया है।
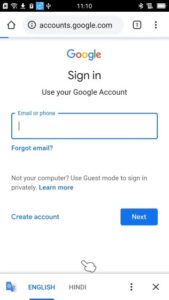
आप कोई ब्राउज़र या ऐप के माध्यम से Log in कर सकते हैं। दोनों में एक ही तरीके होते है ।
Step 2: Manage your Google account
अपने Google खाते में Log in करने के बाद, कोई भी ब्राउज़र खोलें, हो सकता है कि आप अपना Google Play Store खोलें। आप कई तरह से 2-step verification चालू सकते हैं। आप अपनी प्रोफाइल पिक्चर पर प्रेस करे और ” Manage your Google account” पर दबाए, यह वही तरीका है जिससे आप security code खोजने के लिए उपयोग किया था। यदि आप पिछली पोस्ट “Gmail security code कैसे खोजें” पढ़ा हैं तो आप आसानी से अपने मोबाइल पर 2-step verification विकल्प पा सकते हैं।
Step 3: New page
जैसा कि नीचे स्क्रीनशॉट में दिखाया गया है, एक नया पेज खुल जायेगा।
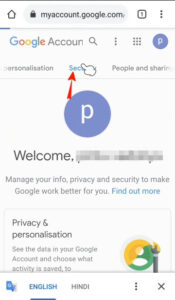
Step 4: Security Options
मेनू को स्क्रॉलिंग करे और ” Security Options” का पता लगाएं, बस ” Security ” पर टैब करें।
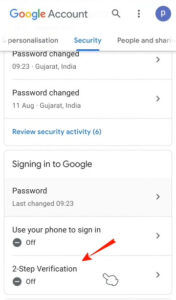
Step 5: 2-step verification option
नीचे स्क्रॉल करें, यहां आप 2-step verification विकल्प देख सकते हैं।
डिफ़ॉल्ट रूप से, 2-step verification विकल्प बंद होता है।
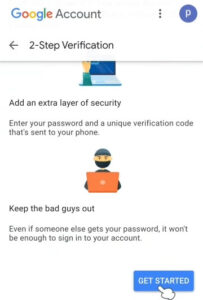
Step 6: 2-step verification
2-step verification पर दबाएं।
जैसा कि नीचे स्क्रीनशॉट में दिखाया गया है।
.
Step 7: GET STARTED
“GET STARTED” पर दबाएं
Step 8: 2-step verification page
कभी-कभी Google आपसे पुष्टि के लिए पासवर्ड मांगता है। फिर आप रीडायरेक्ट 2-step verification पृष्ठ पर पहुंच जाओगे।
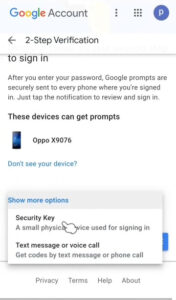
Step 9: Show more options
आप “Continue” पर दबाएं या “Show more options” लिंक पर दबाएं।
जैसा कि नीचे स्क्रीनशॉट में दिखाया गया है।
“Show more options” में आपको दो ड्रॉप-डाउन विकल्प मिलते हैं। Security key and text message or voice call।
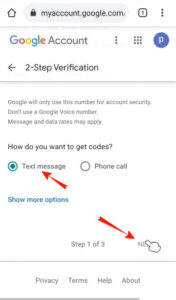
Step 10: Text message or voice call
यहां, हम “Text message or voice call” विकल्प चुनेंगे।
Step 11: Text Message
आप अपने मोबाइल नंबर को डिफ़ॉल्ट रूप से देख सकते हैं कि आपका मोबाइल नंबर पहले से ही sign up के दौरान Google खाते जोड़ा गया था। जब आप एक नया Google Account बनाते हैं, तो उस समय एक मोबाइल नंबर पूछा जाता है, आप वह नंबर दर्ज करे जो नंबर यहां पर एक verification code प्राप्त करने के लिए है। जब आप अपने Google खाते में Log in करते हैं तो इस नंबर पर Google किसी अन्य डिवाइस में Log in करने के लिए एक verification code भेजता है।
आप verification code दो तरह से प्राप्त कर सकते हैं। एक ” text message” के माध्यम से और दूसरा तरीका एक phone call है। हम ” Text Message” विकल्प का उपयोग करेंगे। फिर ” Next” दबाएं। जैसा कि नीचे स्क्रीनशॉट में दिखाया गया है।
Step 12: get verification code
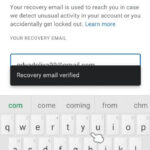
Google ने आपके पासवर्ड की पुष्टि के लिए एक verification code भेजा है।
अपने फ़ोन के टेक्स्ट संदेश की जाँच करें और एक 6-अंकीय verification code टाइप करें।
जैसा कि नीचे स्क्रीनशॉट में दिखाया गया है।
Step 13: Turn on
अब, आप ” Turn on” विकल्प देख सकते हैं।
बस ” Turn on” पर दबाएं।
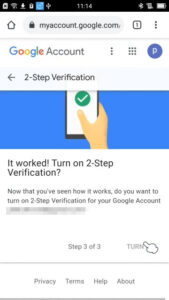
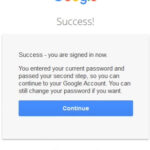
अब, आपका 2-step verification चालू हो गया है। आप इसे किसी भी समय turn off कर सकते है।
अब आपका Google Accountहैकर्स की चोरी से, या कोई भी जानकरी से बचा जा सकता है।

Gmail login karne he bina becup coda ke
Gmail login karna bina backup Court ke